Maintaining your jaw bucket in top - notch condition is crucial for efficient operation and longevity. As a dedicated jaw bucket supplier, I've seen firsthand the importance of proper cleaning procedures. In this blog, I'll share in - depth steps on how to clean a jaw bucket effectively.
Why Cleaning a Jaw Bucket Matters
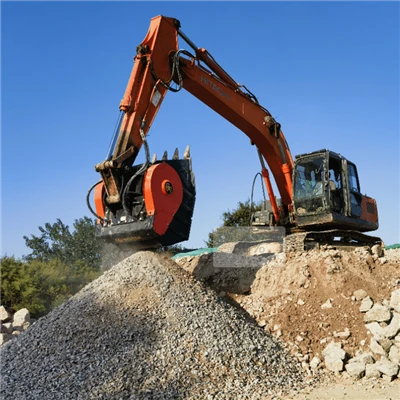
Before we dive into the cleaning process, it's essential to understand why regular cleaning is necessary. Jaw buckets, such as the Excavator Jaw Bucket, are often used in demanding environments like construction sites, quarries, and mining operations. These places expose the bucket to a variety of debris, including dirt, rocks, dust, and even sticky substances like mud. If not cleaned regularly, this debris can build up over time, leading to several issues.
Firstly, the accumulation of debris can affect the performance of the jaw bucket. It may cause the jaws to operate less smoothly, reducing the crushing efficiency. This in turn can lead to increased fuel consumption and longer working hours to achieve the same results. Secondly, the build - up of corrosive materials can damage the bucket's surface, leading to rust and wear. This not only shortens the lifespan of the bucket but also increases the risk of breakdowns during operation.
Pre - Cleaning Preparation
Before you start cleaning the jaw bucket, you need to take some preparatory steps to ensure safety and effectiveness.
- Safety First: Always wear appropriate personal protective equipment (PPE), including safety goggles, gloves, and a dust mask. This will protect you from flying debris, dust, and any chemicals you might use during the cleaning process.
- Isolate the Equipment: Make sure the excavator or the machinery attached to the jaw bucket is turned off and parked on a stable surface. Engage the parking brake and block the wheels if necessary. This will prevent any accidental movement of the equipment during cleaning.
- Inspect the Bucket: Conduct a visual inspection of the jaw bucket to identify any signs of damage, loose parts, or excessive wear. Look for cracks, bent jaws, or any other issues that may need to be addressed before or during the cleaning process.
Step - by - Step Cleaning Process
Step 1: Remove Loose Debris
The first step in cleaning a jaw bucket is to remove any loose debris. You can use a high - pressure air hose or a broom to blow or sweep away dirt, dust, and small rocks from the surface of the bucket. Pay special attention to the areas between the jaws, as debris can easily get trapped there. This will also make it easier to access the more stubborn deposits during the next steps.
Step 2: Soak Stubborn Deposits
For stubborn deposits like mud or dried cement, you may need to soak the affected areas. Prepare a cleaning solution using a mild detergent and warm water. You can also use a specialized industrial cleaner if the deposits are particularly tough. Immerse a clean cloth or sponge in the cleaning solution and apply it to the stubborn areas. Let the solution sit for a few minutes to loosen the deposits.
If you're dealing with a Stone Crusher jaw bucket that has accumulated a lot of stone dust and residue, a more aggressive cleaning agent may be required. However, always test the cleaner on a small, inconspicuous area of the bucket first to ensure it doesn't damage the surface.


Step 3: Scrub the Bucket
After soaking, use a stiff - bristled brush to scrub the jaw bucket. Start from the top and work your way down, paying close attention to all the nooks and crannies. Focus on the areas where debris is most likely to accumulate, such as the edges of the jaws, the hinge points, and the bottom of the bucket. Apply firm pressure while scrubbing to remove the remaining deposits.
For the Rock Crusher Jaws, be extra careful not to damage the surface finish. A wire brush can be used for more stubborn deposits, but make sure to use it gently to avoid scratching the metal.
Step 4: Rinse the Bucket
Once you've scrubbed the entire jaw bucket, rinse it thoroughly with clean water. Use a high - pressure water hose if available to ensure that all the cleaning solution and debris are removed. Make sure to rinse all parts of the bucket, including the areas that were difficult to reach during scrubbing.
Step 5: Dry the Bucket
After rinsing, dry the jaw bucket completely to prevent rusting. You can use a clean cloth to wipe away excess water, or let the bucket air - dry in a well - ventilated area. Avoid leaving the bucket wet for an extended period, especially if it's made of metal.
Post - Cleaning Maintenance
After cleaning the jaw bucket, there are a few additional steps you can take to maintain its condition.
- Lubrication: Apply a thin layer of lubricant to the moving parts of the jaw bucket, such as the hinge points and the pivot pins. This will ensure smooth operation and prevent corrosion.
- Inspection: Conduct another inspection of the bucket to make sure all the debris has been removed and there are no new signs of damage. Check the tightness of all the bolts and nuts and tighten them if necessary.
- Storage: If the jaw bucket is not going to be used immediately, store it in a dry, covered area. This will protect it from the elements and prevent further corrosion.
Conclusion
Cleaning a jaw bucket is a vital part of its maintenance. By following these steps, you can ensure that your jaw bucket remains in optimal condition, providing efficient performance and a long service life. Whether you're using an Excavator Jaw Bucket, a Stone Crusher, or Rock Crusher Jaws, proper cleaning and maintenance will save you time and money in the long run.
If you're in the market for a high - quality jaw bucket or need more information on jaw bucket maintenance, feel free to reach out. We're here to assist you with all your jaw bucket needs and can provide expert advice to ensure you make the best choice for your operations.
References
- Industry best practices for heavy equipment maintenance
- Manufacturer's guidelines for jaw bucket operation and maintenance