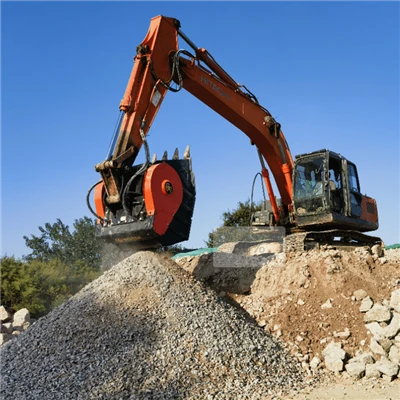
Cleaning a soil mixing tool after use is a crucial step to maintain its performance, extend its lifespan, and ensure the quality of subsequent soil mixing operations. As a supplier of Soil Mixing Tool, I understand the importance of proper cleaning procedures. In this blog, I will share some effective ways to clean a soil mixing tool.
Understanding the Importance of Cleaning
Before delving into the cleaning process, it's essential to understand why cleaning a soil mixing tool is so important. When a soil mixing tool is used, it comes into contact with various types of soil, which may contain dirt, clay, sand, and other debris. If these residues are not removed promptly, they can accumulate on the tool's surface and components, leading to several problems.


Firstly, the accumulated soil can cause corrosion and wear on the tool's metal parts. Corrosion can weaken the structural integrity of the tool, making it more prone to damage and failure. Wear can also reduce the efficiency of the tool, as it may affect the movement of its components and the quality of the soil mixing.
Secondly, the presence of soil residues can contaminate the next batch of soil being mixed. This can lead to inconsistent soil properties and affect the performance of the soil stabilization or other related processes. For example, in Mass Soil Mixing, the uniformity of the soil mixture is crucial for achieving the desired engineering properties.
Pre - cleaning Inspection
Before starting the cleaning process, it's necessary to conduct a pre - cleaning inspection of the soil mixing tool. This inspection helps to identify any visible damage, loose parts, or areas with heavy soil buildup.
- Visual Inspection: Carefully examine the entire tool, including the mixing blades, shafts, and housing. Look for signs of cracks, dents, or other physical damage. Check if any parts are loose or missing.
- Identify Heavy Buildup Areas: Pay special attention to areas where soil is likely to accumulate, such as the corners of the mixing chamber, the edges of the blades, and the spaces between the components. These areas may require more intensive cleaning.
Cleaning Steps
Step 1: Remove Loose Soil
The first step in cleaning a soil mixing tool is to remove as much loose soil as possible. This can be done using a brush or a compressed air gun.
- Brush Cleaning: Use a stiff - bristled brush to scrub the tool's surface. Start from the top and work your way down, brushing off the loose soil. Focus on the areas with visible soil deposits.
- Compressed Air Cleaning: If available, use a compressed air gun to blow away the loose soil from hard - to - reach areas. This can help to dislodge soil particles that are trapped in small crevices.
Step 2: Soak the Tool
After removing the loose soil, soak the soil mixing tool in a cleaning solution. The cleaning solution can help to break down the remaining soil and grease.
- Choose the Right Cleaning Solution: Select a cleaning solution that is suitable for the type of soil and the material of the tool. For general soil cleaning, a mild detergent mixed with water can be used. However, if the soil contains oil or grease, a degreasing agent may be required.
- Soaking Time: Immerse the tool in the cleaning solution and let it soak for an appropriate amount of time. The soaking time depends on the degree of soil buildup. For light soil deposits, 30 minutes to an hour may be sufficient, while for heavy deposits, it may take several hours or even overnight.
Step 3: Scrub and Rinse
After soaking, use a brush to scrub the tool again to remove the softened soil. Pay attention to the areas that were identified as having heavy soil buildup during the pre - cleaning inspection.
- Scrubbing: Use a brush with appropriate bristles to scrub the tool's surface. Apply moderate pressure to ensure that all the soil is removed. For stubborn soil deposits, a wire brush may be used, but be careful not to damage the tool's surface.
- Rinsing: Once the scrubbing is complete, rinse the tool thoroughly with clean water. Make sure to remove all the cleaning solution and soil residues. Use a hose or a pressure washer for a more efficient rinse.
Step 4: Dry the Tool
After rinsing, it's important to dry the soil mixing tool completely to prevent corrosion.
- Air Drying: Place the tool in a well - ventilated area and let it air dry naturally. This may take several hours, depending on the size of the tool and the environmental conditions.
- Using a Cloth or Blower: To speed up the drying process, you can use a clean cloth to wipe off the excess water. Alternatively, a blower can be used to blow hot air over the tool.
Post - cleaning Maintenance
After cleaning the soil mixing tool, it's important to perform some post - cleaning maintenance tasks to ensure its long - term performance.
- Lubrication: Apply lubricant to the moving parts of the tool, such as the bearings and shafts. This helps to reduce friction and prevent wear.
- Inspection and Tightening: Conduct another inspection of the tool to ensure that all parts are clean, dry, and in good condition. Tighten any loose bolts or nuts.
- Storage: Store the soil mixing tool in a dry and protected area. If possible, cover the tool to prevent dust and moisture from accumulating on it.
Special Considerations for Different Types of Soil Mixing Tools
There are different types of soil mixing tools, such as handheld mixers, large - scale industrial mixers, and Slurry Infrastructure Maker. Each type may require some special cleaning considerations.
- Handheld Mixers: Handheld soil mixing tools are usually smaller and more portable. They can be easily cleaned using the steps mentioned above. However, extra care should be taken when cleaning the electrical components to avoid water damage.
- Industrial Mixers: Large - scale industrial soil mixing tools may have complex structures and larger mixing chambers. Cleaning these tools may require more time and resources. In some cases, it may be necessary to disassemble the tool partially for a more thorough cleaning.
- Slurry Infrastructure Maker: These tools are used for creating slurry mixtures. They may come into contact with more viscous materials. Special cleaning solutions may be required to break down the slurry residues. Additionally, the pipes and nozzles of these tools need to be cleaned carefully to prevent clogging.
Conclusion
Properly cleaning a soil mixing tool after use is essential for its performance, longevity, and the quality of soil mixing operations. By following the steps outlined in this blog, you can effectively clean your soil mixing tool and ensure its optimal performance.
As a supplier of Soil Mixing Tool, we are committed to providing high - quality products and valuable information to our customers. If you have any questions about soil mixing tools, cleaning procedures, or are interested in purchasing our products, please feel free to contact us for further discussion and procurement negotiation.
References
- ASTM International standards related to soil mixing equipment maintenance.
- Manufacturer's manuals for soil mixing tools.